
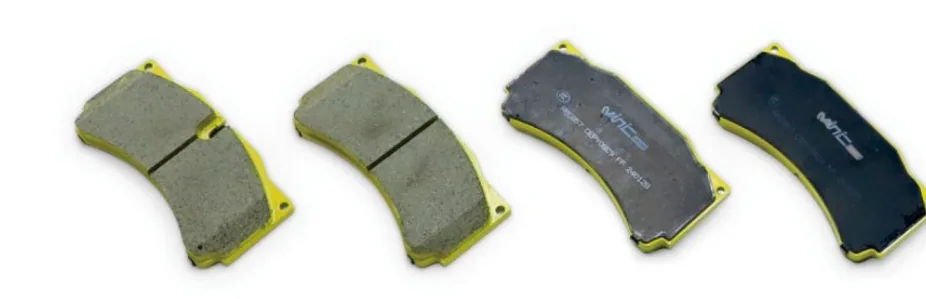

You just bolted on a fresh set of pads. The pedal feels fine, the car stops — so you are done, right? Not quite. The single most-skipped step in any brake job is the one that decides whether those new pads deliver their full friction, stay quiet, and wear evenly for the next tens of thousands of miles: the bed-in. This guide walks through what bedding actually does, the exact procedure for street and track compounds, and the mistakes that undo it.
The Short Answer
Bedding (or breaking in) brake pads means performing a series of controlled, progressively harder stops — typically 6 to 10 moderate stops followed by 2 to 3 firmer ones, with cool-down time between sets and never holding the pedal at a full stop while hot. The process transfers a thin, even layer of friction material onto the rotor face, and that transfer layer is what your pads actually grip for the rest of their life. Skip it, and you invite judder, noise and weak bite.
What Is Brake Pad Bedding?
Brake pads do not grip bare iron well. They grip a microscopic film of their own friction material that has been smeared — by heat and pressure — onto the rotor surface. That film is called the transfer layer. A proper bed-in builds it gradually and evenly, so the pad always rides on a consistent friction surface.
Bedding also does two quieter jobs. First, it heat-cycles the pad itself, burning off resins and gases left from manufacturing (this is why new pads sometimes smell on their first hard stops). Second, it mates the pad face to the exact surface of your rotors, establishing full contact across the sweep area instead of a few high spots.
Why Bedding Matters More Than You Think
The classic symptom of skipped bedding gets misdiagnosed constantly: a steering-wheel shimmy under braking that everyone blames on “warped rotors.” In most cases the rotor is not warped at all — the transfer layer is patchy. Where the layer is thick, friction is high; where it is thin, friction drops. That uneven grip, felt dozens of times per wheel revolution, is the judder. Machining or replacing the rotor only resets the problem if the pads were never bedded properly in the first place.
Uneven transfer also means uneven wear, more dust, and a higher chance of the low-speed squeal that sends people searching for answers about brakes squeaking after new pads. Ten careful minutes after install prevents all of it.
Before You Start: The Pre-Bedding Checklist
- Rotor condition: bed new pads on new, freshly machined, or at minimum un-grooved rotors. Bedding onto a glazed or lipped rotor transfers a bad pattern from the first stop.
- Hardware: caliper slide pins lubed, shims and clips fitted, pad contact points greased. A dragging caliper overheats the pad during bedding.
- Location: a straight, quiet road or empty lot where you can reach 55–60 mph and brake repeatedly without traffic. Never bed brakes on public roads in traffic.
- Plan: you will not come to a complete stop for the next ten minutes except once at the very end. Plot your loop before you start.
Street Compound Bedding Procedure
Street compounds — including our low-dust, low-noise street pads rated from 0 to 650°C with a friction coefficient of μ 0.40–0.46 — are engineered to work from cold, so their bedding is gentle. The goal is a gradual temperature ramp, not heat shock.
- Make 6–10 moderate stops from about 60 mph down to 15 mph. Use medium pedal pressure — a firm commuter stop, not a panic stop. Release the pedal at 15 mph and keep rolling.
- Drive roughly half a mile between stops to let the rotors shed heat. You want them warm, not smoking.
- Follow with 2–3 firmer stops from 60 mph to 15 mph, at about three-quarter braking effort.
- Drive for 5–10 minutes with minimal braking to cool everything down.
- Park and let the brakes cool fully for at least an hour. Avoid holding the pedal down at the final stop — pad material can imprint on a hot rotor at a standstill.
For the next 200–300 miles, brake a little earlier and smoother than usual. The transfer layer is still stabilizing.
Sport and Track Compound Bedding Procedure
Higher-temperature compounds need more heat to transfer properly — and they tolerate it. Our sport pads run μ 0.42–0.50 across a 0–850°C window, and bedding them is about building a robust transfer layer that survives repeated high-energy stops. If you are bedding pads for an event, do it days before — never the morning of, and never on the way to the track.
- Start with the street sequence above: 6–10 moderate stops from 60 to 15 mph with cool-down gaps. This establishes the base layer without shocking a cold pad.
- After a 5-minute cooling drive, make 4–6 hard stops from 70–80 mph down to 20 mph at near-threshold braking — just short of ABS engagement.
- Expect smell and possibly light smoke from the pads on the later stops. That is the compound heat-curing; it is normal. What is not normal is continuing once the pedal goes long or the bite fades — that is overheating, so stop and cool down.
- Finish with a 10-minute cool-down drive using as little brake as possible, then park without holding the pedal.
One extra rule for track compounds: after their first event, let the brakes cool completely, then perform 2–3 moderate stops to refresh the transfer layer that extreme heat has stripped. It restores cold-street manners for the drive home.
The Most Common Bedding Mistakes
| Mistake | What It Does | The Fix |
|---|---|---|
| Coming to a full stop and holding the pedal while hot | Pad material imprints on one spot of the rotor — instant judder | Always roll off the brakes before stopping instead of holding with the foot brake; if the car must be held, use the handbrake briefly — but on rear disc setups, come to a complete stop and let the rotors cool first when possible |
| Too few stops, too little heat | Transfer layer never forms; weak bite and squeal follow | Complete the full sequence — the stops should get harder, not lazier |
| Bedding on glazed or worn rotors | The pads copy the rotor’s defects into the transfer layer | Start with new or freshly machined rotors |
| Bedding in traffic or on a short road | Interrupted stops cool the pads mid-cycle and patch the layer | Find a long, empty stretch and finish the procedure in one session |
| Hard stops on a stone-cold pad | Heat shock cracks the pad surface; uneven transfer | Always ramp up: moderate stops first, hard stops last |
How to Tell the Bed-In Worked
A properly bedded setup shows a uniform, slightly darker gray-blue transfer layer across the rotor’s sweep area — no streaks, no banding at the edges. The pedal feels consistent stop after stop, bite is immediate and progressive, and there is no vibration through the wheel or pedal under braking. If you see patchy coloring or feel judder, do not panic: in mild cases, repeating the full bedding sequence on clean rotors fixes it.
Bedding New Pads on Old Rotors — and Other Combinations
New pads + used rotors: acceptable if the rotors are within thickness spec, un-grooved and un-lipped. Consider a light scuff with sandpaper to remove the old transfer layer first. New rotors + used pads: workable, but the used pads’ worn face will take extra stops to mate — add 3–4 moderate stops to the sequence. New pads + new rotors: the ideal case; follow the standard procedure exactly.
FAQ
Do I really need to bed in brake pads?
Yes. Every pad manufacturer assumes a bed-in; the friction figures quoted for a compound are only reached once the transfer layer exists. Skipping it does not just cost performance — it causes the uneven deposits behind most “warped rotor” complaints.
How long does bedding brake pads take?
About 10–15 minutes of driving for the active procedure, plus an hour of parked cool-down. Then treat the first 200–300 miles as a gentle finishing period.
Can I bed pads on the street, or do I need a track?
The street procedure is done entirely on public-road-legal speeds — you just need a quiet stretch. Only the hard-stop phase of a track-compound bed-in approaches speeds that call for a closed road or empty lot.
Do I need to re-bed after a track day?
A light refresh helps: after everything has cooled, 2–3 moderate stops rebuild the street transfer layer that track heat strips away, restoring cold bite and reducing noise on the drive home.
Get a Quote Built Around Your Car
Tell us your year, make and model — we confirm fitment first, then quote. No guesswork, no wrong parts.